When homeowners consider a shade sail, one of the most common questions we hear is:
“How does the installation actually work?”
Unlike off-the-shelf canopy systems, a professionally installed shade sail is a custom-engineered structure—from post placement and footing depth to fabric tension and attachment points.
Step 1: Planning Post Locations & Shade Coverage
Every successful shade sail installation starts with layout and load planning.
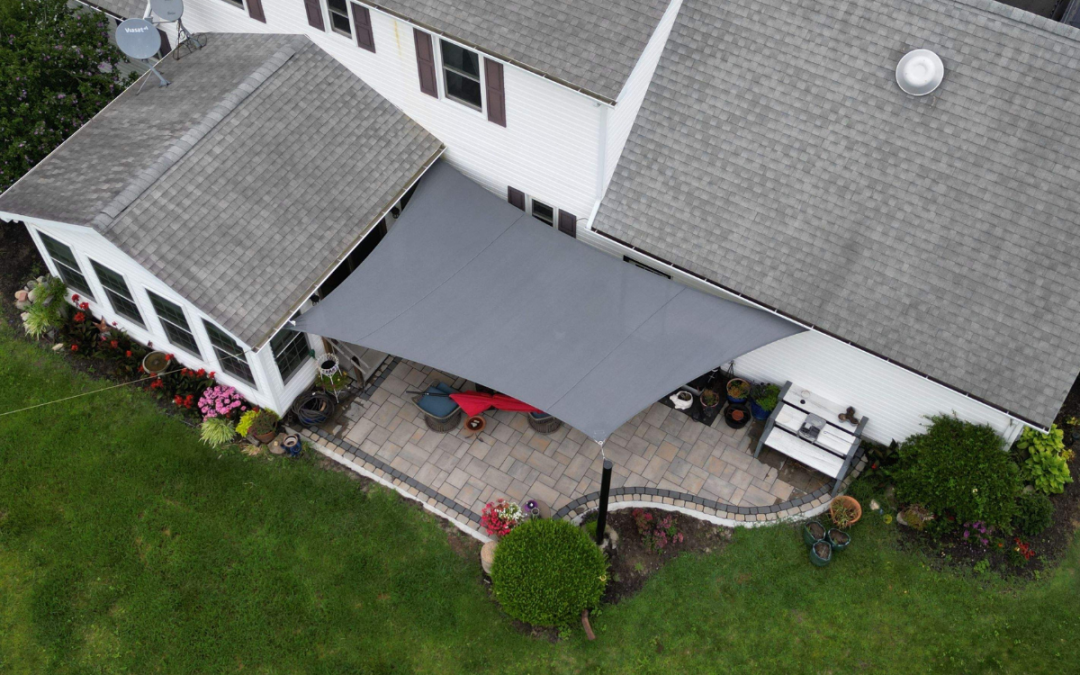
For this Annapolis home, the goal was to create usable shade over a newly finished paver patio while keeping the space open and visually clean. That meant:
- Determining the ideal sail shape and orientation
- Establishing anchor points that would safely handle tension loads
- Positioning posts to allow proper drainage pitch in the fabric
Because shade sails rely entirely on tension, even small placement errors can lead to sagging, pooling water, or premature wear.

Step 2: Installing Steel Posts with Proper Footings
Once placement was finalized, installation began with heavy-duty steel posts—the backbone of the entire system.
Key details of this phase included:
- Excavating footings to the correct depth
- Setting posts plumb and square
- Securing posts in concrete to handle sustained tension loads
These posts were powder-coated black for durability and clean aesthetics, blending into the surrounding architecture and landscape.
This step is essential: shade sails exert constant pulling force, and the structure must be engineered to resist that force year after year.

Step 3: Fabrication & Hardware Preparation
While site work was underway, the shade sail itself was fabricated to exact project specifications.
- Precision sizing
- Reinforced corners
- Marine grade stainless steel hardware
Each sail is cut and finished to allow the correct amount of stretch once tensioned—too much or too little stretch can compromise performance.

Step 4: Shade Sail Installation & Final Tensioning
With posts cured and hardware installed, the shade sail was carefully mounted and tensioned.
This final step ensures:
- Smooth, wrinkle-free fabric
- Proper angle for water runoff
- Even load distribution across all anchor points
Tensioning is done gradually and precisely—this is where professional installation truly matters.
The result is a floating canopy effect that offers shade without blocking views or closing in the space.
The Finished Result: Shade Without Compromise
The completed shade sail offers:
- Comfortable, breathable shade
- A modern architectural element
- Long-term durability in Maryland’s changing seasons
Most importantly, it transforms the patio into a functional outdoor living space—without permanent roof structures or bulky frames.